System Settings/Notification Settings
Notification Settings
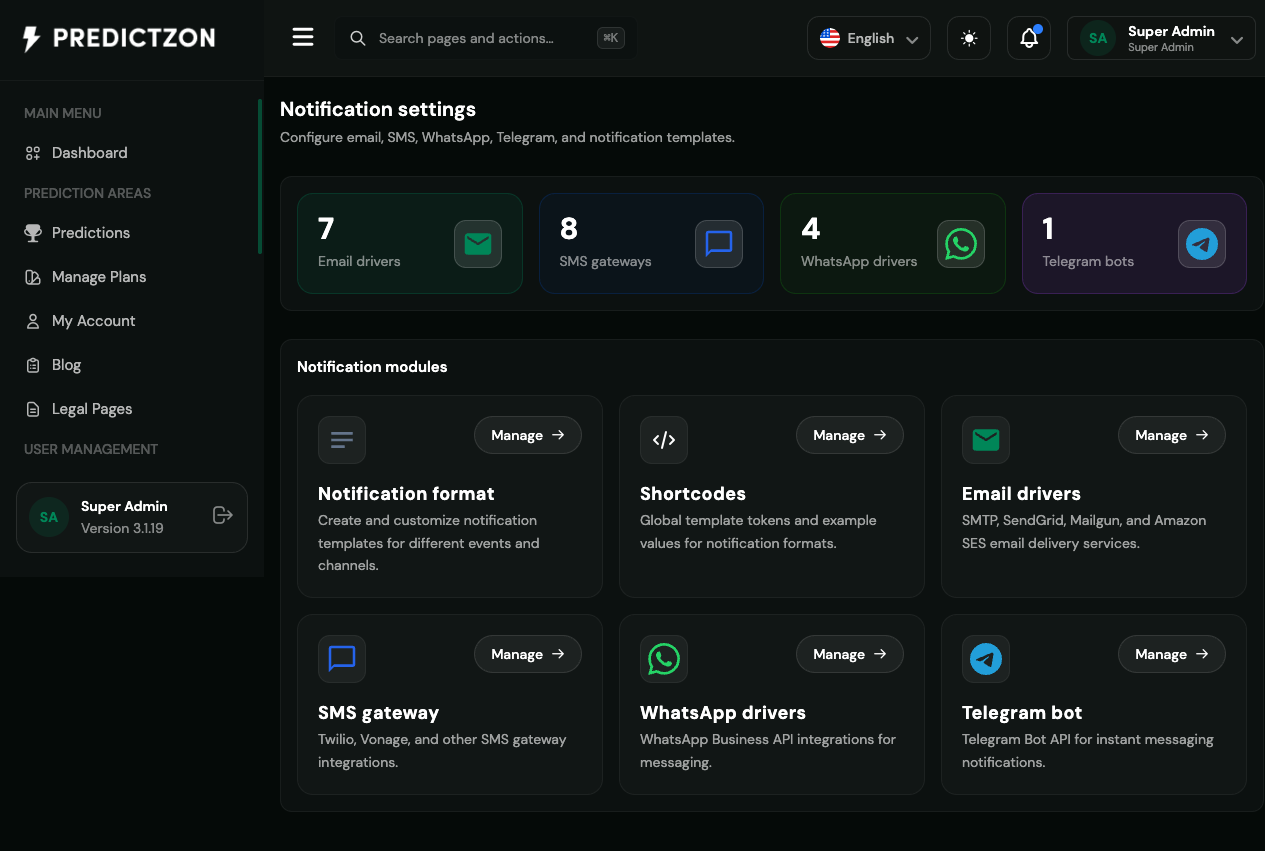
The Notification Settings module configures how your platform sends notifications to users. You can set up email, SMS, WhatsApp, and Telegram delivery channels with customizable templates.
Accessing Notification Settings
- Log in to the admin panel at
https://your-domain/admin
- Click Notification Settings in the sidebar under "System Settings"
- You will land on the Notification Settings hub page
Notification Settings Overview
The hub page provides access to all notification configuration modules:
| Module | Description |
|---|
| Email Drivers | Configure email delivery providers |
| SMS Drivers | Configure SMS delivery providers |
| WhatsApp Drivers | Configure WhatsApp delivery |
| Telegram Drivers | Configure Telegram bot delivery |
| Formats | Customize notification templates |
| Shortcodes | Manage dynamic content variables |
Email Drivers
Navigate to Notification Settings → Email Drivers to configure email delivery.
Configuring Email Drivers
- Select an email driver from the list
- Configure the driver settings:
SMTP Configuration
| Setting | Description |
|---|
| Host | SMTP server hostname |
| Port | SMTP port (usually 587 or 465) |
| Username | SMTP authentication username |
| Password | SMTP authentication password |
| Encryption | TLS or SSL encryption |
| From Address | Sender email address |
| From Name | Sender display name |
Mailgun Configuration
| Setting | Description |
|---|
| API Key | Mailgun API key |
| Domain | Sending domain |
| Region | US or EU region |
SendGrid Configuration
| Setting | Description |
|---|
| API Key | SendGrid API key |
| From Email | Verified sender email |
| From Name | Sender display name |
- Click Save to update
- Click Test to send a test email
Testing Email Delivery
- Click the Test button
- Enter a test email address
- Click Send Test
- Check the inbox for the test email
SMS Drivers
Navigate to Notification Settings → SMS Drivers to configure SMS delivery.
Configuring SMS Drivers
- Select an SMS driver from the list
- Configure the driver settings:
Twilio Configuration
| Setting | Description |
|---|
| Account SID | Twilio account SID |
| Auth Token | Twilio authentication token |
| From Number | Twilio phone number |
Nexmo Configuration
| Setting | Description |
|---|
| API Key | Nexmo API key |
| API Secret | Nexmo API secret |
| From Number | Nexmo phone number |
- Click Save to update
- Click Test to send a test SMS
WhatsApp Drivers
Navigate to Notification Settings → WhatsApp Drivers to configure WhatsApp delivery.
Configuring WhatsApp Drivers
- Select a WhatsApp driver from the list
- Configure the driver settings:
WhatsApp Business API
| Setting | Description |
|---|
| API URL | WhatsApp Business API endpoint |
| Access Token | API access token |
| Phone Number ID | Business phone number ID |
- Click Save to update
- Click Test to send a test message
Telegram Drivers
Navigate to Notification Settings → Telegram Drivers to configure Telegram delivery.
Configuring Telegram Bot
- Configure the Telegram bot settings:
| Setting | Description |
|---|
| Bot Token | Telegram bot token from @BotFather |
| Bot Username | Bot username (without @) |
| Webhook URL | Webhook URL for receiving messages |
- Click Save to update
- Click Test to send a test message
- Click Configure Webhook to set up the webhook URL
Telegram Bot Setup
- Open Telegram and search for @BotFather
- Create a new bot with
/newbot
- Copy the bot token
- Paste the token in the configuration
- Configure the webhook URL
Navigate to Notification Settings → Formats to customize notification templates.
Managing Templates
| Action | Description |
|---|
| Create Template | Add a new notification template |
| Edit Template | Modify existing template |
| Delete Template | Remove a template |
Template Fields
| Field | Description |
|---|
| Name | Template identifier |
| Channel | Email, SMS, WhatsApp, or Telegram |
| Subject | Email subject line (email only) |
| Body | Notification content |
| Shortcodes | Dynamic variables (see below) |
Using Shortcodes
Shortcodes are dynamic variables that get replaced with actual values:
| Shortcode | Description |
|---|
{{name}} | User's name |
{{email}} | User's email |
{{amount}} | Transaction amount |
{{plan}} | Subscription plan name |
{{date}} | Current date |
{{time}} | Current time |
{{site_name}} | Your site name |
{{link}} | Action link |
Notification Shortcodes
Navigate to Notification Settings → Shortcodes to manage available shortcodes.
Creating a Shortcode
- Click Create Shortcode
- Enter the shortcode details:
- Key — Shortcode identifier (without braces)
- Description — What this shortcode represents
- Default Value — Fallback if no value available
- Click Save
Editing a Shortcode
- Click Edit on the shortcode row
- Modify the details
- Click Save
Notification Workflow
The typical notification workflow:
- Event occurs — User action triggers notification
- Template selected — System picks appropriate template
- Shortcodes replaced — Dynamic values inserted
- Channel selected — Email, SMS, WhatsApp, or Telegram
- Message sent — Delivery via configured driver
- Delivery confirmed — System logs delivery status
Best Practices
- Test all channels — Verify email, SMS, and Telegram work
- Use shortcodes wisely — Personalize notifications for engagement
- Keep templates updated — Review and update notification content
- Monitor delivery rates — Track notification success rates
- Provide opt-out — Allow users to manage notification preferences
- Backup configurations — Export driver settings regularly
Related Pages